


 Minecraft Bedrock
Looking to spice up your Bedrock world? Behavior and texture packs are an incredible way to completely customize your Minecraft server. They act similarly to mods or data packs on Java Edition, allowing you to change mob behaviors, add custom items, modify loot tables, and so much more.
There are two ways to install them on MintServers. The easiest is the built-in Bedrock Addons tab, which lets you browse and install packs straight from your panel. If the pack you want is not listed there, you can upload it manually and link it to your world file. Let us get your new packs installed!
Always make sure your server is completely stopped before editing world files or uploading new packs. If the server is still running while you make changes, your world could get corrupted or your settings will not save!
Method 1: Install From the Bedrock Addons Tab (Recommended)
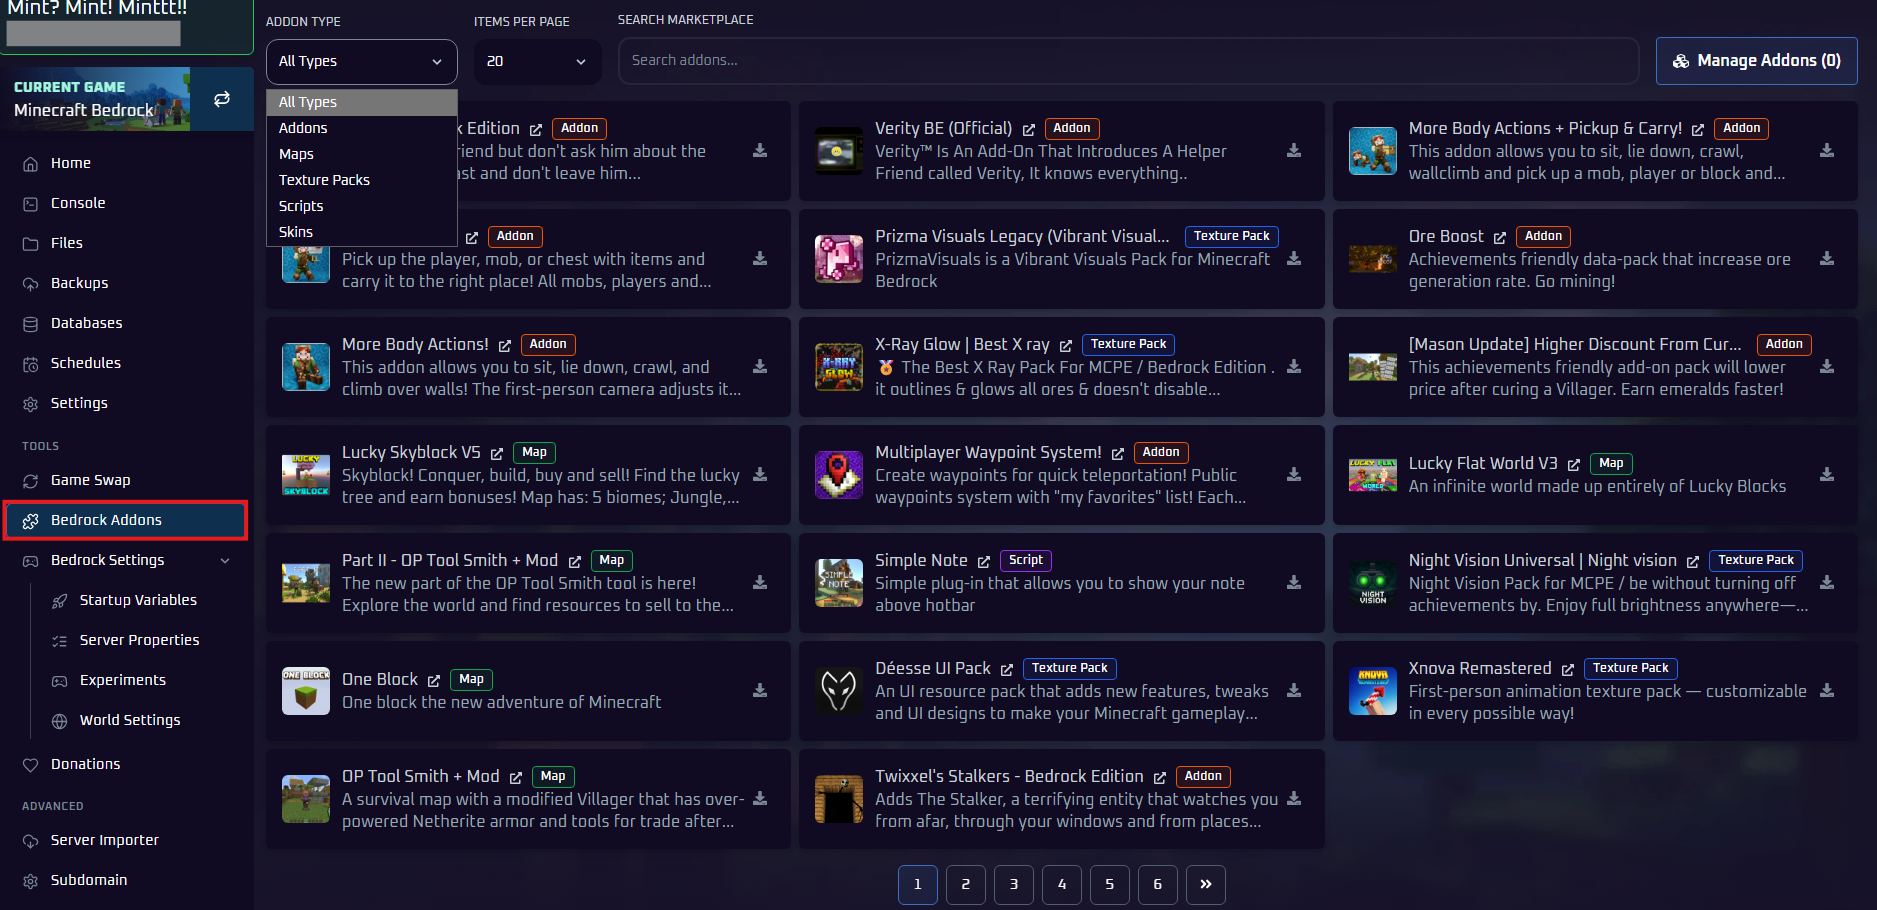
The Bedrock Addons tab is a built-in marketplace where you can search for addons, maps, texture packs, scripts, and skins and add them to your server without downloading or uploading any files yourself.
- Log into your MintServers panel and click the Stop button to safely shut down your server.
- In the left-hand sidebar, scroll down to the
Toolssection and click onBedrock Addons. - Use the
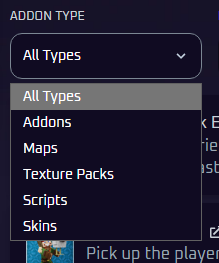
Addon Typedropdown to filter what you are looking for:Addons,Maps,Texture Packs,Scripts, orSkins. You can also type a name into theSearch addons...box. - Find the pack you want and click the download icon on the right side of its card to install it on your server.
- To review or remove what you have installed, click the
Manage Addonsbutton at the top right of the page. - Head back to the Console tab and click Start. Your world will now load with the new packs!
Method 2: Install a Pack Manually
If the pack you want is not available in the Bedrock Addons tab, you can upload it yourself. This takes a few more steps since we have to link the pack to your specific world file, but it is still very straightforward. We even built a free Pack Checker below that reads your downloaded file and tells you exactly where it goes.
Step 1: Download Your Pack
First, download the behavior or texture pack you want to use from a reputable site like MCPEDL. Make sure you download the Bedrock version. The pack will usually download as a .mcpack, .mcaddon or .zip file. Do not extract it yet!
Step 2: Check Your Pack (Optional)
Not sure if your download is for Bedrock or Java, or which folder it belongs in? Drop your file into the Pack Checker below. It tells you if the pack is compatible with your server, which folder to upload it to, and gives you the exact text to paste into your world file.
The Pack Checker needs JavaScript to run. If it does not load, no worries! Just follow the manual steps below instead.
If you would rather do it by hand, the next two steps show how.
Step 3: Extract and Upload the Pack
Next, we need to extract your pack and upload it to your server's file manager. If you used the Pack Checker, it already told you which folder to take and where to put it.
- If your downloaded file ends in
.mcpackor.mcaddon, simply rename the file extension to end in.zipinstead (e.g., changecoolpack.mcpacktocoolpack.zip). - Extract the
.zipfile on your computer. You should now have a folder containing several files inside, including one very important file namedmanifest.json. This entire folder is what we need to upload. - Log into your MintServers panel and click the Stop button.
- On the left-hand sidebar, click on the Files tab.
- Locate either the
behavior_packsfolder or theresource_packsfolder (depending on the type of pack you downloaded) and click to open it. - Click the Upload button and upload the entire pack folder (the one with the
manifest.jsonfile inside) into this directory.
📁 behavior_packs (or resource_packs)
📁 YourCustomPackFolder
Step 4: Activate the Pack in Your World
Just uploading the files is not enough; we now have to tell your specific world to load the pack using its unique ID.
- In the pack folder you just uploaded to the panel, click on the
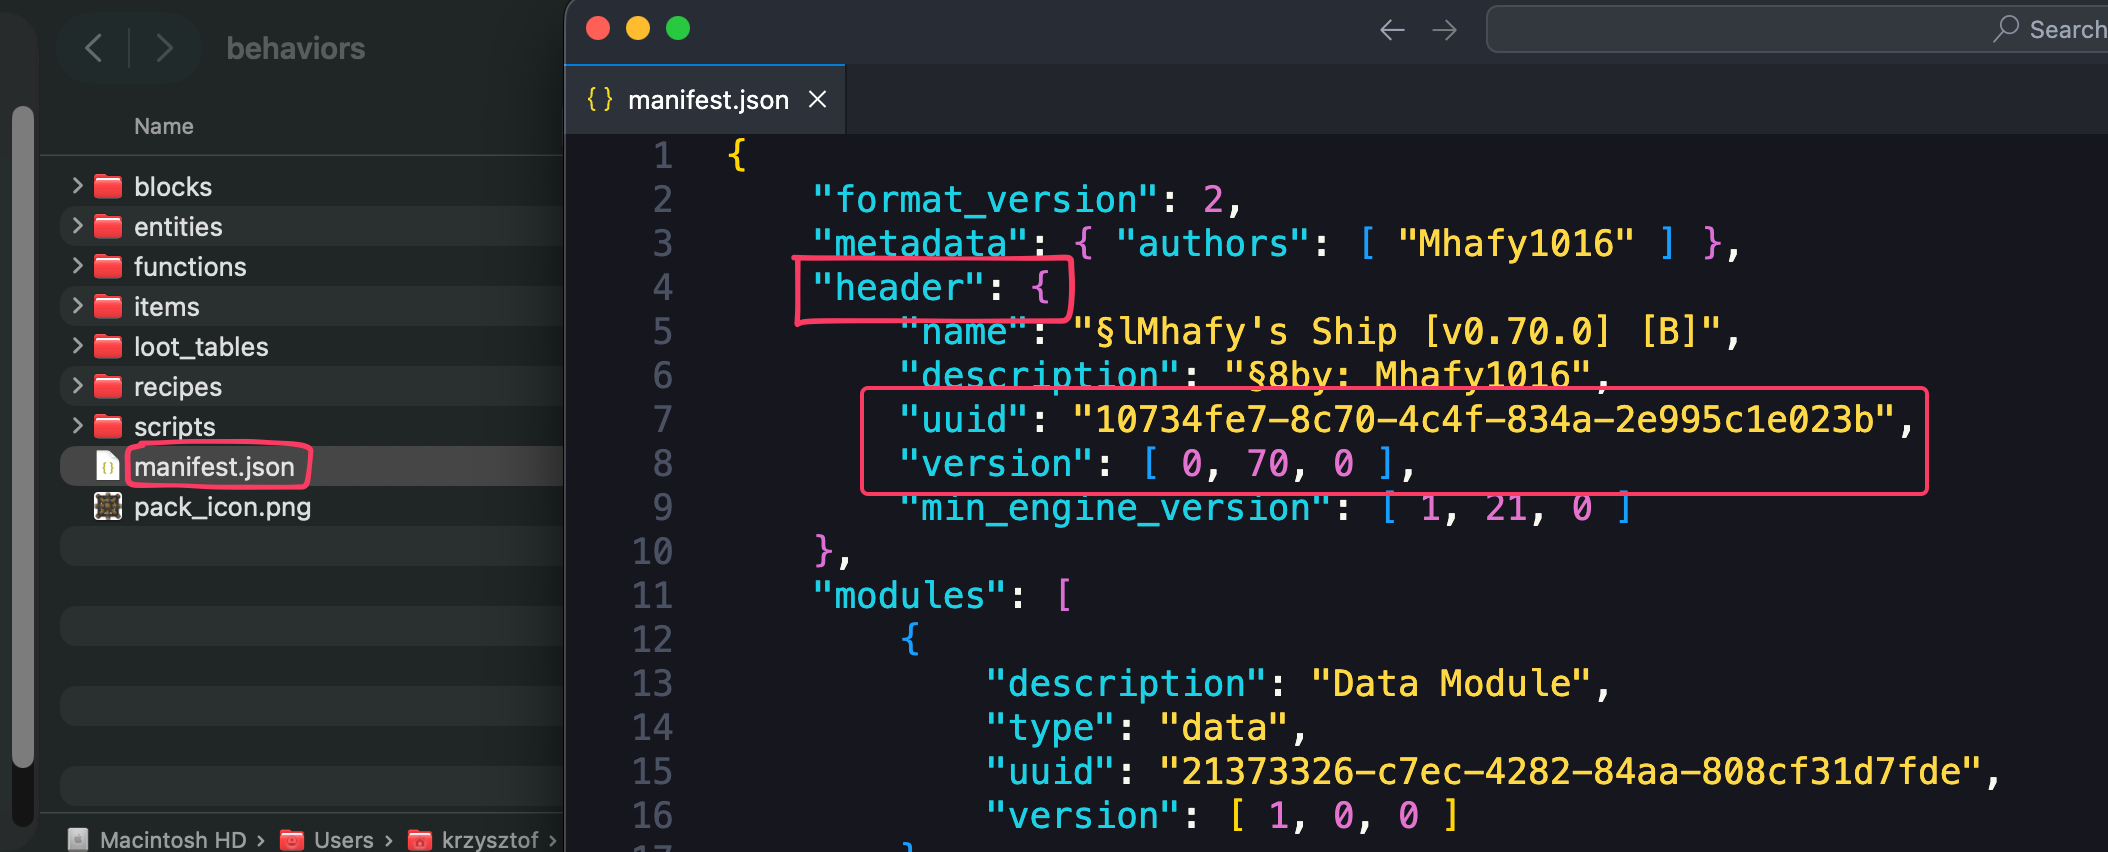
manifest.jsonfile to open it in the text editor. - Look closely at the code. You need to highlight and copy two specific values from the "header" section: the
uuidand theversion. Keep these handy! - Go back to your main file directory and navigate into the
worldsfolder, and then open your specific world's folder (usually namedBedrock levelunless you changed it). - Click on the
world_behavior_packs.jsonfile (orworld_resource_packs.jsonif you are installing a texture pack) to edit it. If it does not exist, create a new file with that exact name. - You will need to paste your new pack's UUID and version into this file using a specific format. For a single pack, format it exactly like this:
📁 worlds
📁 Bedrock level
📄 world_resource_packs.json (Click to edit this file)
If you are adding multiple packs at once, you must list them all inside the main square brackets [], separated by a comma. It should look like this:
- Once your UUIDs and versions are perfectly pasted in, click Save Content.
- Head back to the Console tab and click Start. Your world will now load with the packs fully activated!
🛠️ Troubleshooting Tips
- Not sure if your pack is for Bedrock or Java: Bedrock packs contain a
manifest.jsonfile, while Java packs contain apack.mcmetafile. Java packs will not work on a Bedrock server. The Pack Checker in Method 2 can tell you for sure. - Can't find your pack in the Bedrock Addons tab: Not every pack is listed in the marketplace. Download it from a site like MCPEDL and follow Method 2 to install it manually.
- Server will not start or pack is not working: The most common issue here is a syntax error in the JSON file. One missing comma or bracket will break the whole file! Double-check your formatting, or paste your code into an online JSON validator to check for missing symbols.
- Compatibility: Make sure the pack you downloaded is actually compatible with your server's current version of Bedrock. Outdated packs usually will not function correctly on newer updates.
If you have checked your JSON formatting and your packs still are not loading, no worries! Just open a support ticket and our team will gladly instruct you on how to resolve the configuration.