


 Minecraft Java
Want to share your Minecraft singleplayer world with friends on a multiplayer server? This guide shows you how to upload your local Minecraft world to your MintServers server so friends can join your builds, redstone contraptions, and adventures.
Uploading is now a simple drag and drop. There is no need to compress your world, create folders, or use SFTP. Just drop your world onto the World Manager page and the server detects what it is and sets it up for you.
Step 1: Find Your Singleplayer World
First, we need to locate the folder for your world on your own computer.
- Launch your Minecraft client.
- Navigate to the Singleplayer menu.
- Find the world you want to upload and click it once to highlight it.
- Click the Edit button at the bottom of the screen.
- Select Open World Folder to instantly open your world on your computer.
- Go up one folder level so you can see the folder for your whole world (it is named after your world). This is the folder you will upload.


Step 2: Drag and Drop Your World
Now we can send your world straight to the server. The server works out the rest.
- Log into your MintServers game panel.
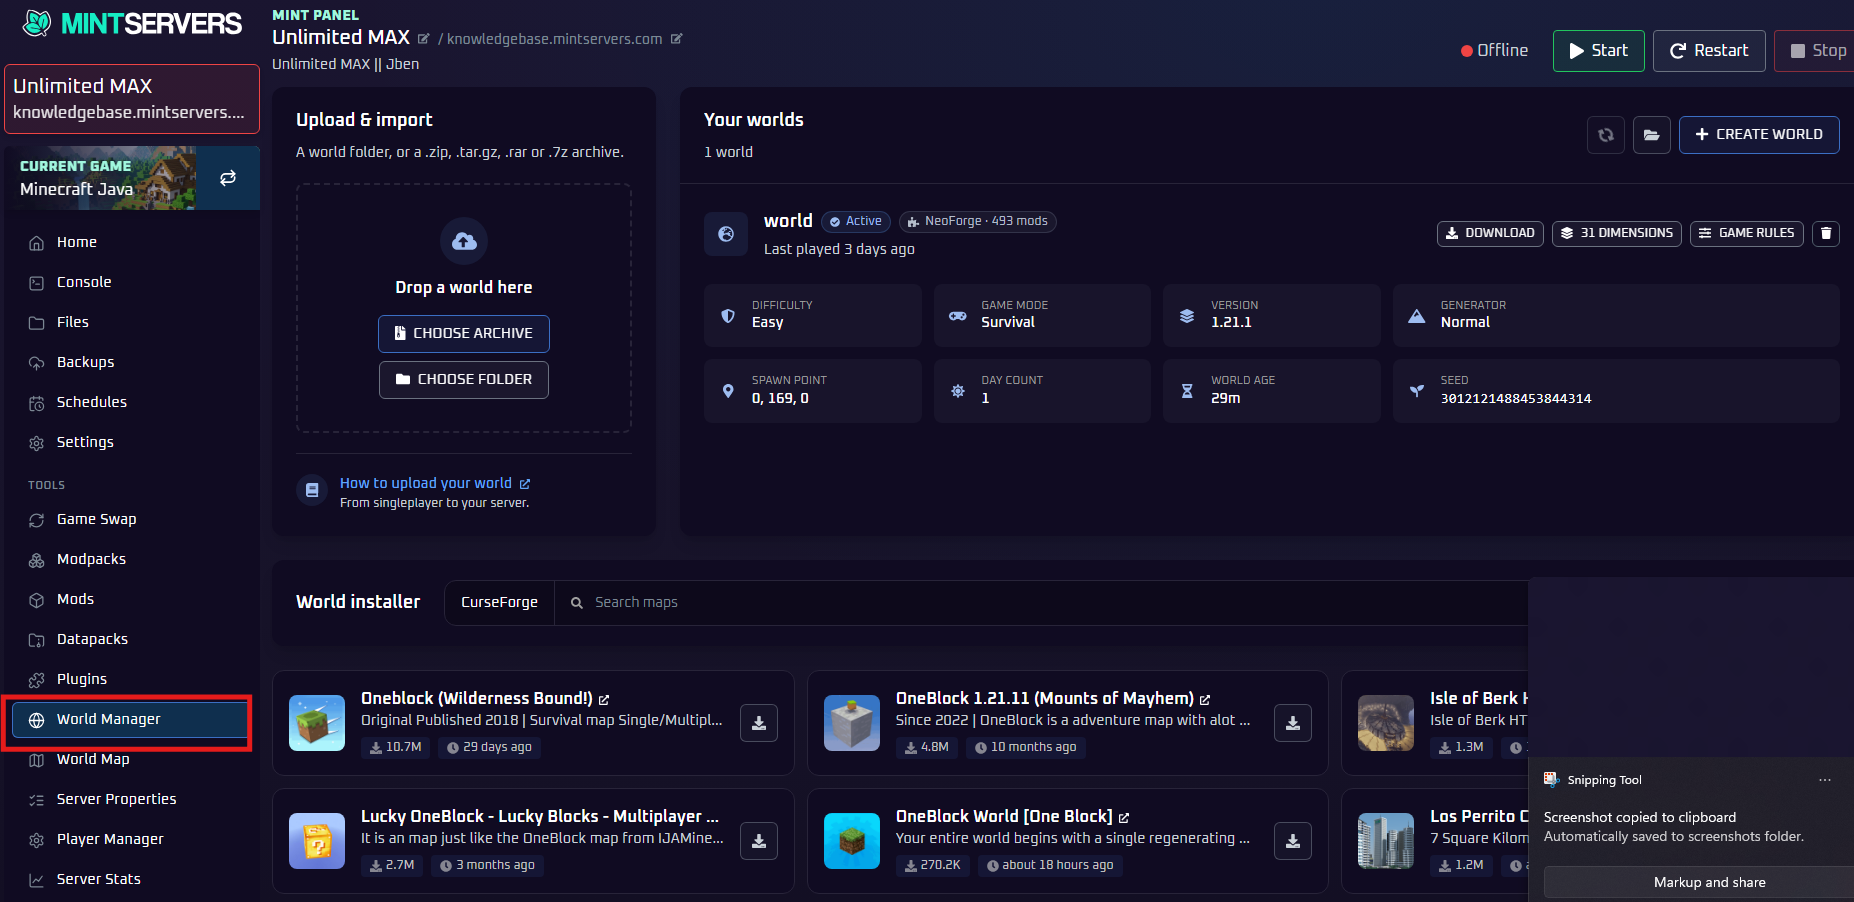
- Click on World Manager in the left sidebar, under Tools.
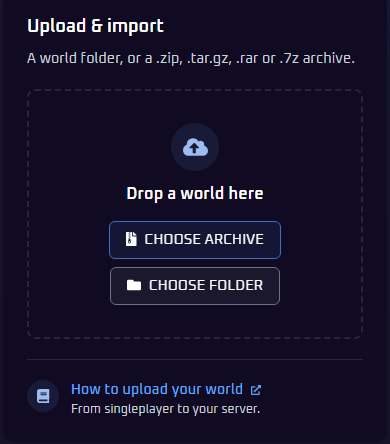
- In the Upload & import box, drag your world folder from your computer and drop it onto Drop a world here. You can also click Choose Folder and pick your world folder instead.
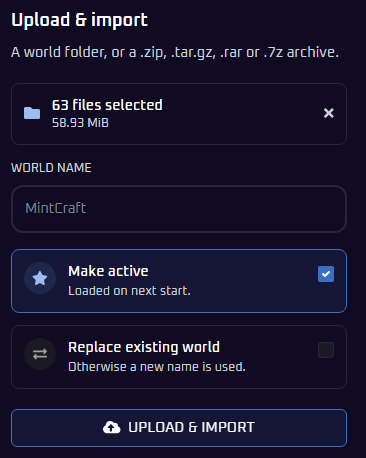
- The box will now show how many files you selected and their total size. Under World Name, type a name for your world (up to 48 characters).
- Choose your options:
- Make active: ticked by default. Your world will be loaded the next time the server starts.
- Replace existing world: tick this if you want your upload to replace the existing world. If you leave it unticked, a new name is used for your upload instead, so nothing is overwritten.
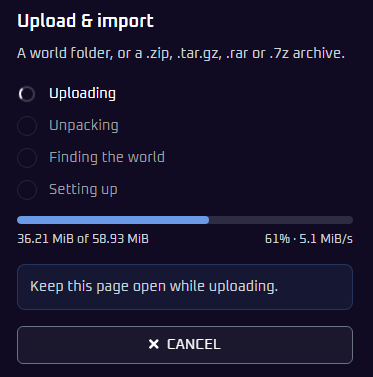
- Click Upload & Import. The box will show your progress as it moves through four stages: Uploading, Unpacking, Finding the world and Setting up. Keep the page open until it finishes. If you need to stop, click Cancel.
- When it is done, your world will appear under Your worlds, ready to use.
Planning to tick Replace existing world? Take a backup of your current world first, since the existing world will be replaced.
There is no file size limit, so even very large worlds (10 GB or more) can be uploaded this way. Large uploads simply take longer on a slower internet connection, so keep the page open until it finishes.
Step 3: Start Your Server
Almost done! Go to the Console tab and start your server. Once it is online, join it and your singleplayer world will be waiting for you.
Create a New World
You do not need to upload anything to get a fresh world. You can create one straight from the World Manager page.
- Open World Manager from the left sidebar.
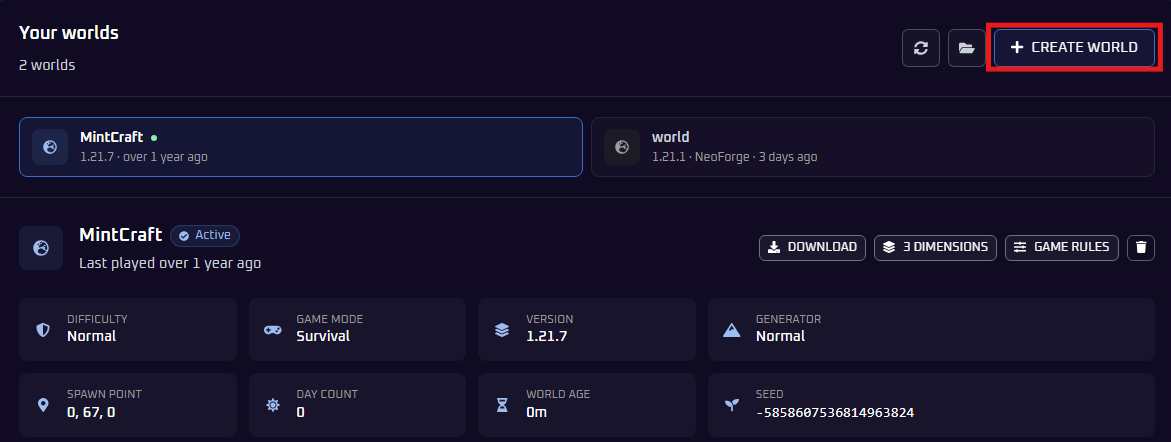
- Click Create World at the top right of the Your worlds section.
- Pick the settings you want for your world, for example turning on Hardcore.
- Create the world, then start your server.
Prefer a Ready-Made Map?
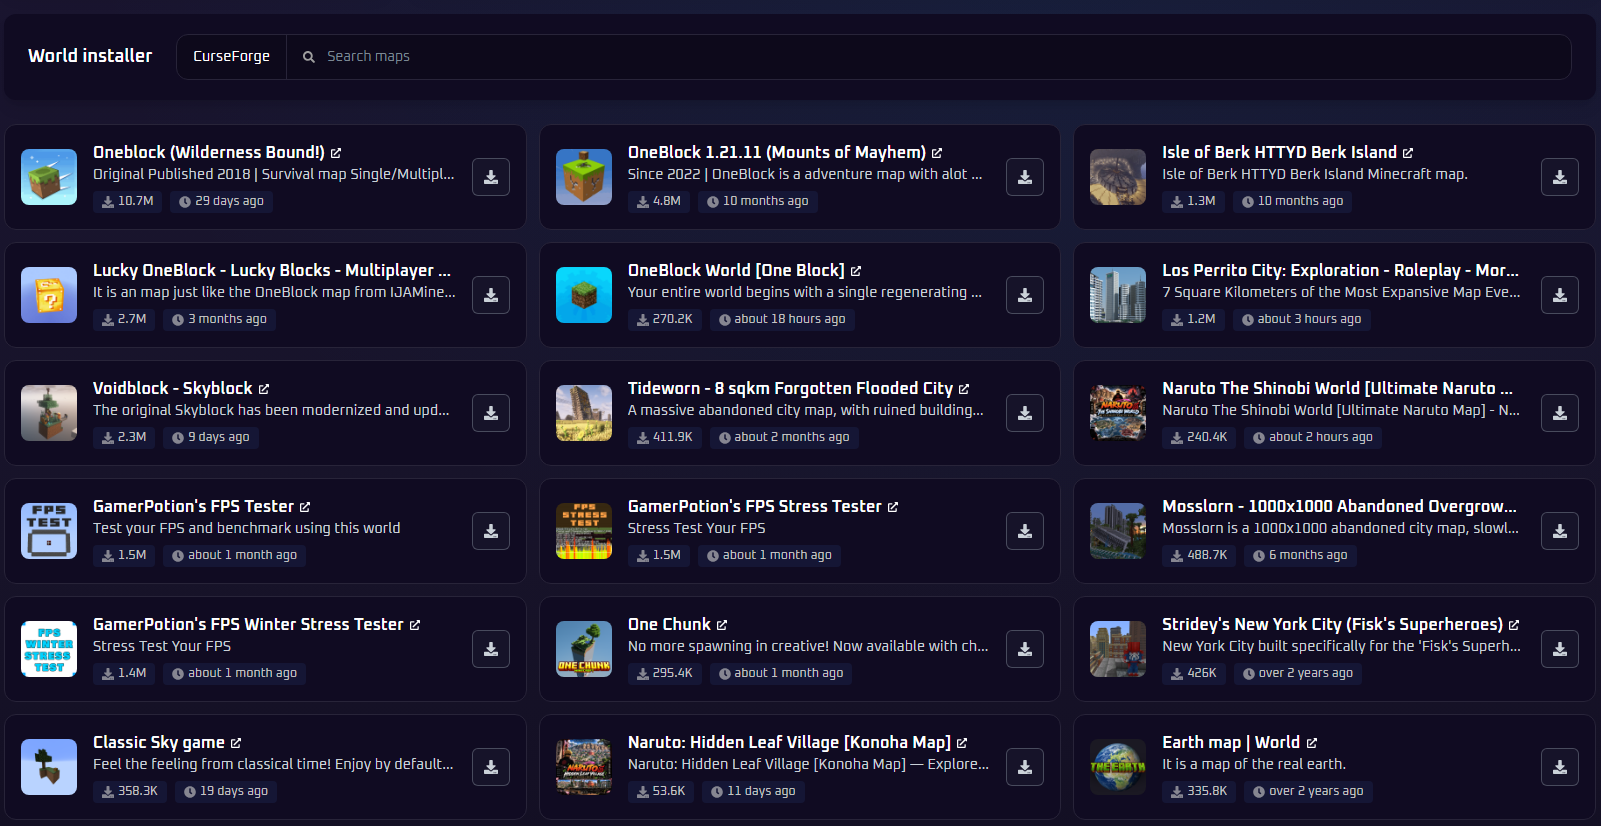
The World Manager page also has a World installer underneath, where you can search for maps on CurseForge and install them to your server with one click.
View Your World Seed
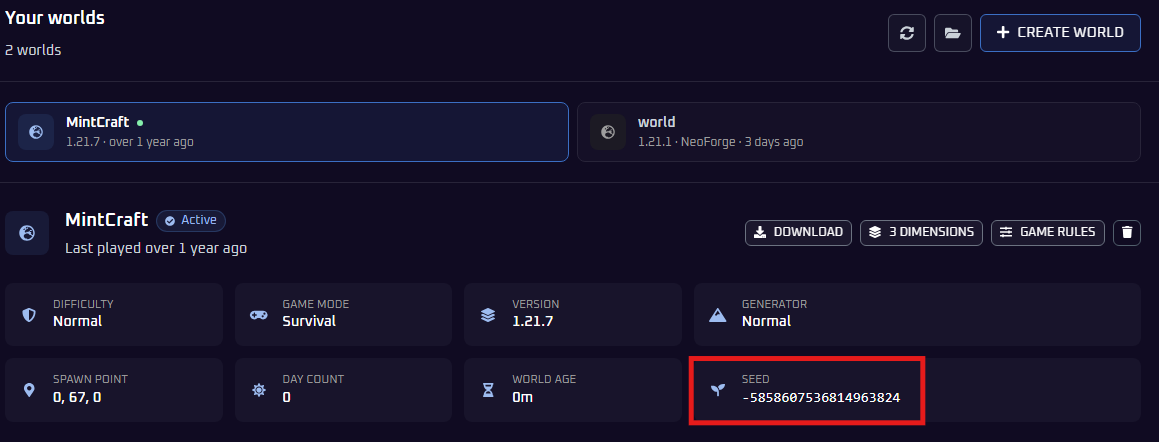
Each world on the World Manager page shows its details, including its seed, so you can find it without typing any commands or opening any files.
- Open World Manager from the left sidebar.
- Find your world under Your worlds. If you have more than one world, select the one you want from the list at the top. The Seed is shown in the world's details, alongside its difficulty, game mode, version and more.
Need to find the seed another way, such as in-game? See our guide on how to find your Minecraft server seed.
Troubleshooting
That is it! Your singleplayer world is now running on your server, ready for multiplayer adventures. If you connect and see a fresh world instead of your uploaded one, make sure the upload finished completely before you started the server, and that your uploaded world appears under Your worlds on the World Manager page and is marked Active. If it is not marked Active, check that Make active was ticked when you uploaded it. Then restart the server and try again.
Playing on Bedrock Edition instead? Follow our guide on how to upload a Minecraft Bedrock world. If you are still running into trouble, just open a support ticket and our team will gladly jump in to get your world loaded up properly.